

Showing posts with label quilted fabric crib rail guard protector. Show all posts
Showing posts with label quilted fabric crib rail guard protector. Show all posts
Tuesday, December 21, 2010


Saturday, February 7, 2009
Patchwork Fabric Quilted Crib Rail Guard
 Your little one will love the stimulating designs of this fabric! This guard is wide enough to fit many convertible wide rail cribs. Click HERE to visit my shop, New England Quilter, to see the listing for specific details. Would you like to design your own instead? Visit my shop to purchase a 10 page tutorial with step by step instructions for designing and making your own quilted crib rail guard. The tutorial includes 38 color photos to help guide you. Don't Sew? I have also designed a No Sew Tied Quilted Crib Rail Guard tutorial for those of you who don't sew as well!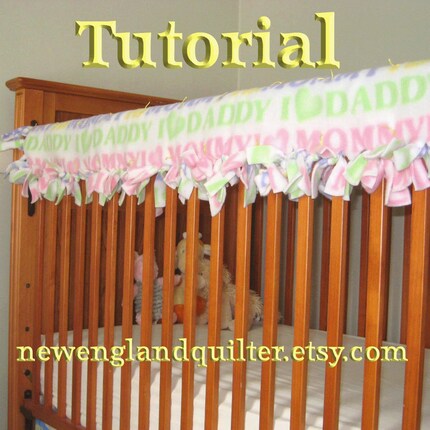

Sunday, June 22, 2008
Teething and Reaching New Heights
 We all want our babes to thrive and grow stronger and taller. However, with the good comes the bad. My babe can now reach the ends of his crib which are much higher than the rails. The ends are massive solid rectangular pieces of wood. How in the world was I going to protect my babe from these? Nothing like a problem to inspire a bit of mommy creativity. I decided to make a rectangular quilt with extra fabric on the perimeter to slide ribbon through. Then I could cinch up the ribbon to hold the quilted guard to the end of the crib.
 I placed a second piece of fabric underneath the Baby Snoopy fabric shown above, right sides together. Then I stitched them together, turned right sides out and machine quilted where there was batting. Then I top stitched a seam to provide a slot for the ribbon. I slid the ribbon through and went to the nursery. It fit fine, but I knew that my little guy could tear it down in no time! So, back to the sewing machine. I top stitched another aisle to slide elastic through. After sliding the elastic through, I went back to the nursery. I placed the guard on the crib and cinched the elastic as tight as it would go. I noted the location and then tied off the elastic. Then I placed the guard back on the crib and tugged. It was secure!! I do not think that the babe will be able to tear it down with the addition of the elastic. I left the ribbon in as well. I figured a little extra cinching never hurt! This is what the final quilted guard looks like.
I have written three Do It Yourself Tutorials available in my Etsy shop and my Artfire Shop. There are even two No Sew Tutorials.
Subscribe to:
Posts (Atom)