
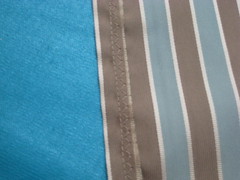
We painted our kitchen and those old valances just had to go!! Read my previous post to see why I decided to make these myself! Click Here. You do not need a liner for this pattern, because the design is a tube providing two layers of fabric. Once you figure out how much fabric you need, the sewing is VERY EASY!! I think that even a beginner sewer could handle this project; so get started!!
Materials & Equipment:
Fabric (See below to figure out how much)
Thread to match
Pins
Ruler
Measuring tape
Basic Sewing Machine
BEFORE YOU BEGIN
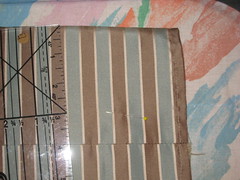
First, you need to figure out how much material you are going to need. Measure the length of your window. Multiple that number by 1.5. (If you want more of a scrunch, then multiply by 2.) This is the length needed for that window. I found that most home decor fabric that I looked at came in widths of 54 inches. As a result, I needed to sew pieces together to get the required length. The height for this tutorial is 30 inches which inclues a 3 inch hole for the curtain rod. (Note: Heights can be adjusted to meet your needs.) So, after you have found your required length(s), add them together, if you are customizing more than one window. So, say that your lengths were 78, 84 and 100. This is close to what mine were for the kitchen in our old farmhouse. Each window is different. I don't remember the actual numbers. For the 100 length, I would use 2 widths of fabric (108 inches) and sewed them together. Note: It is okay if your lengths are approximate and go over a bit; but you really should try to use the minimum. (Rule of thumb: Use a length 1.5-2 times the measure of your window.) For the 78 and 84, I took one width of the fabric and cut it in half. Then, I sewed each half to a complete width of 54 to give 81 inches for each valance. At $16 a yard, I wasn't going to buy another 30 inches of fabric for 3 inches. So, I needed 2 widths for the 100 length, and 3 widths for the other two windows. So, we have a total of 5 widths of fabric at 30 inches each. 5x30=150 inches of fabric. 150/36=4.167 yards = 4 yds, 2 inches. Always round up, because they never square up your fabric before they cut it in the store. So, I bought 4.25 yards of fabric. Square your fabric and cut the required lengths and sew pieces together. Now we are ready to begin!!
STEP 1
Turn and press raw edges 1/2 inch. Then sew 1/4 inch seam. Then zigzag from seam to the edge. I do not have a serger, so two trips down the edge were required.
 Step 2
Fold fabric in half, right sides together, pin and then sew 1/4 inch seam. Press seam and then turn fabric right sides out.
 Step 3
Slide tube of fabric so that the seam is 4 inches from the top and pin so it stays in place.
Step 4
Then, stitch a seam 1 inch in from the top to create the header.

Step5
Stitch just under seam to create the bottom of the 3 inch hole for the curtain rod.
 You are Done!! Time to hang those new Valances!!
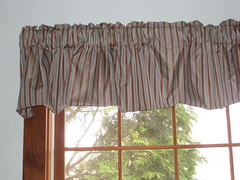
6 comments:
You make it sound so easy!
NEQ...love your color combinations!! I have made my own valances for years....when I realized how easy it really was....and the price that shops wanted was crazy...must charge by the stitch...lol...great editorial...so easy to follow!!
Thanks!
Wow! Looks great! I don't believe you that it's easy, but you did an awesome job. :)
Nice tutorial! Sewing curtains like that is so easy. It's the way to go when you want things to match!
Awesome tutorial, Amy!!!
Very easy method! Thanks for sharing it!
Post a Comment