Wednesday, May 28, 2008

Custom Curtain Valance Tutorial

INTRODUCTION
We painted our kitchen and those old valances just had to go!! Read my previous post to see why I decided to make these myself! Click Here. You do not need a liner for this pattern, because the design is a tube providing two layers of fabric. Once you figure out how much fabric you need, the sewing is VERY EASY!! I think that even a beginner sewer could handle this project; so get started!!

Materials & Equipment:
Fabric (See below to figure out how much)
Thread to match
Pins
Ruler
Measuring tape
Basic Sewing Machine

BEFORE YOU BEGIN
First, you need to figure out how much material you are going to need. Measure the length of your window. Multiple that number by 1.5. (If you want more of a scrunch, then multiply by 2.) This is the length needed for that window. I found that most home decor fabric that I looked at came in widths of 54 inches. As a result, I needed to sew pieces together to get the required length. The height for this tutorial is 30 inches which inclues a 3 inch hole for the curtain rod. (Note: Heights can be adjusted to meet your needs.) So, after you have found your required length(s), add them together, if you are customizing more than one window. So, say that your lengths were 78, 84 and 100. This is close to what mine were for the kitchen in our old farmhouse. Each window is different. I don't remember the actual numbers. For the 100 length, I would use 2 widths of fabric (108 inches) and sewed them together. Note: It is okay if your lengths are approximate and go over a bit; but you really should try to use the minimum. (Rule of thumb: Use a length 1.5-2 times the measure of your window.) For the 78 and 84, I took one width of the fabric and cut it in half. Then, I sewed each half to a complete width of 54 to give 81 inches for each valance. At $16 a yard, I wasn't going to buy another 30 inches of fabric for 3 inches. So, I needed 2 widths for the 100 length, and 3 widths for the other two windows. So, we have a total of 5 widths of fabric at 30 inches each. 5x30=150 inches of fabric. 150/36=4.167 yards = 4 yds, 2 inches. Always round up, because they never square up your fabric before they cut it in the store. So, I bought 4.25 yards of fabric. Square your fabric and cut the required lengths and sew pieces together. Now we are ready to begin!!

STEP 1
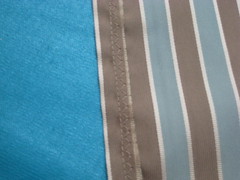
Turn and press raw edges 1/2 inch. Then sew 1/4 inch seam. Then zigzag from seam to the edge. I do not have a serger, so two trips down the edge were required.
Step 2
Fold fabric in half, right sides together, pin and then sew 1/4 inch seam. Press seam and then turn fabric right sides out.
Step 3
Slide tube of fabric so that the seam is 4 inches from the top and pin so it stays in place.


Step 4
Then, stitch a seam 1 inch in from the top to create the header.


Step5
Stitch just under seam to create the bottom of the 3 inch hole for the curtain rod.
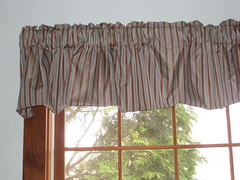
You are Done!! Time to hang those new Valances!!
Tuesday, May 27, 2008

A Day at the Beach

We went to Kiawah Island in SC for vacation this year. David just turned one and got to explore the sand for the first time. He played with his sieve and shovels a little bit, but he really liked playing with his stroller. We brought the beach ball to the beach, but it blew away two times. My husband and I took turns chasing it! When we got back to our villa, we played with the beach ball inside. David used it as a walker and took 6-7 steps! He is just learning how to walk.

In the photo above, David is wearing a handmade outfit by Holly of Winklepots. She hand painted the adorable crab on the shirt and sewed the lightweight pants, which were perfect for playing in the sand. If you would like to visit Holly's online shop, you can find her Etsy site by clicking here. You will find quality hand painted children's clothing and handmade Korker hair bows

Monday, May 12, 2008

Cherry Tree In Bloom


If you read my previous post, you know that I did a ton of yard work this past weekend. One nice part about each trip of weeds to the woods was the Cherry Tree on the way. The street we love on has many Cherry Trees and they look and smell beautiful this time of year. We only have one Cherry Tree on our property - in the back yard. It is next to an apple tree. It is really gorgeous when they are both in bloom. The white and pink blossoms compliment each other well. I am not the best photographer, but I hope that I captured enough of the tree's beauty for you to enjoy!


Sunday, May 11, 2008

She Mulched and Mulched, Until She Could Mulch No More

What did I do this weekend? I mulched. 4 cubic yards of mulch was delivered to our house on Friday. The delivery guy was one of my former students. In case you are not sure how much 4 cubic yards of much is, take a look below! In the background, you can see our Cherry Tree beginning to bloom and the Wiffle Fenway Ballpark behind that. I should do a post on our Wiffle Fenway Field. It was even surveyed to be 20% of Fenway's Dimensions - but we'll leave that for another day!My husband originally thought that the flower garden was fine and did not need attention. Well, I'll let you judge. He is the almost "before" photo. I say almost, because I had weeded about half the garden at this point.

I actually had most of the garden weeded by Friday night. I came in at 7:30 p.m. Then, Saturday, I started mulching. This is what the garden looked like at about 10:00 a.m. on Saturday. My husband came out with the babe to check my progress and said, " Huh, I forgot that the garden had stepping stones."

I worked until dark, about 8:00 p.m. I knew what I would spend my Mother's Day doing. Well, about 10:00 a.m. I finished mulching the flower garden.


I thought, "This is great, I'm done with the flower garden. " When I ordered the mulch, I figured enough to do by the tiger lily's by the back of the barn and around a huge tree trunk.


So, I mulched around the Tiger lily's and the big tree. I still had about a quarter of the pile of mulch to place. I knew that I should have only ordered 3 Cubic yards! The guy at the store convinced me to order 4. So ... what to mulch next?? So, I mulched the Cedar Trees, the bed of Irises by the barn, all along the perimeter of the garage and barn. When that was finished, there was only a few buckets of mulch left which I placed at the back of the flower garden. Did I mention that I popped the wheel on the wheel barrow yesterday while weeding? So poor hubby was wheeling around a flat wheeled wheel barrow today - bless him :)
Here are the Cedar trees and the bed of Irises - which really need thinning after they bloom!


Finally, at 7:45 p.m. I had finally finished raking the last bit of mulch from the yard. The big pile of mulch was now gone. Thank goodness! Now I could go enjoy what remained of Mother's Day! If you look closely at the picture below, you can see where that big pile of mulch once lived.


HAPPY MOTHER'S DAY TO ANY MAMA'S OUT THERE WHO MIGHT BE READING THIS :)

Wednesday, May 7, 2008

Custom Curtain Valances for My Kitchen


Since my husband and I bought our old farmhouse from the 1860's 6 years ago, we have slowly been painting and re-carpeting a couple rooms a year. The last two rooms to get a face lift were the dining room and the kitchen. We chose Valley Mist by Behr found at the Home Depot for the color. I must have brought home 200 paint colors to match the color to the curtains in the dining room, and the curtains were bought to match the fabric on the dining room chairs. Then we wanted to paint the kitchen a shade of green. We decided to paint the kitchen and dining room the same color. When my husband finished painting the walls in the kitchen, I looked up at the valances and thought, "These have got to go!" So, I took a paint sample to the fabric stores in search of home decor fabric to match the walls.

I am very glad that I know how to sew. We looked into getting custom curtains for the library/den in our house when we redid that room. For 5 windows, the estimate was something like $2,800!! And that did not include the drapery hardware. The sales lady told us that we really had to look at curtains like another piece of furniture. I went to Bed Bath and Beyond and bought curtains and rods that look just lovely for under $200.

Now I needed a pattern. I looked in a book about curtains that I had bought several years ago. Nothing jumped out at me. Then, I looked online. I found a nice tutorial, but not really what I wanted. So, I used the old valances for my pattern - which is actually a very simple pattern for a valance. I took pictures as I sewed so that I can write my own tutorial later on. If you can sew a straight line, then you too could make these valences.

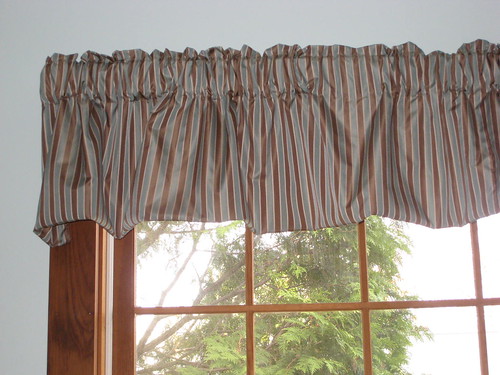
I really like the brown with the green-blue striped fabric, because it helps accent the wooden windows. Click Here to see my tutorial on how to make these yourself!

Friday, May 2, 2008

From Babe to Boy

As my little guy turned one this past week, lots of memories resurfaced. I have been uploading photos to an album in Snapfish that I will order prints from. As I look back at the photos, I see how much David has grown up, from the first day he rolled over to sitting up and now standing. I know that any day he will start walking. My sweet angelic baby is turning into a sweet little boy right before my eyes.