
Showing posts with label tutorial. Show all posts
Showing posts with label tutorial. Show all posts
Tuesday, December 21, 2010


Sunday, February 8, 2009
Thomas the Train Quilt for the Little Guy!
 My little guy loves Thomas the Train! When I saw this fabric panel online, I knew that I wanted to make David a quilt. I found some cute Thomas the Train track fabric at Walmart for the back of the quilt. This was a quick quilt to make. I placed the batting on the floor, followed by the backing, wrong side down, and then the quilt top, right side down. I pinned the layers together and sewed around the perimeter, leaving a space to turn the quilt right side out. Next, I removed the pins, turned the quilt right side out, and blind stitched the opening closed. Finally, I tied the quilt, spaced at every 5 inches.
Saturday, February 7, 2009
Patchwork Fabric Quilted Crib Rail Guard
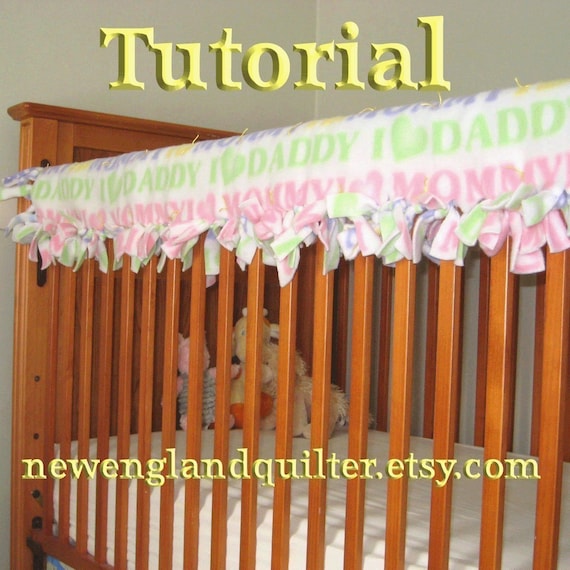
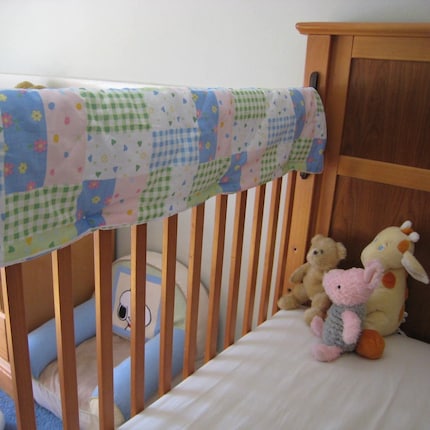 Your little one will love the stimulating designs of this fabric! This guard is wide enough to fit many convertible wide rail cribs. Click HERE to visit my shop, New England Quilter, to see the listing for specific details. Would you like to design your own instead? Visit my shop to purchase a 10 page tutorial with step by step instructions for designing and making your own quilted crib rail guard. The tutorial includes 38 color photos to help guide you. Don't Sew? I have also designed a No Sew Tied Quilted Crib Rail Guard tutorial for those of you who don't sew as well!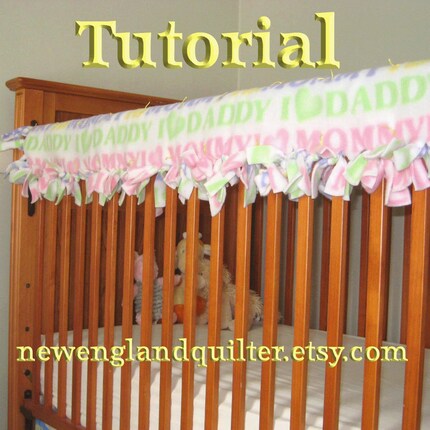
Thursday, January 22, 2009
No Sew Tied Quilted Crib Rail Guard Tutorial TM

Now available for sale in my Etsy shop: No Sew Tied Quilted Crib Rail Guard Tutorial. This PDF file tutorial includes 28 color photos and step by step instructions to make your own padded quilted crib rail guard. Once you have bought the fabric to go with your nursery, it should take less than 2 hours to make a guard. Click HERE to visit my Etsy shop for more details. Or to visit my Artfire Studio, click HERE.
Please do not copy any part of this post or photos without prior written permission.
Thank you!
Thank you!
Saturday, September 20, 2008
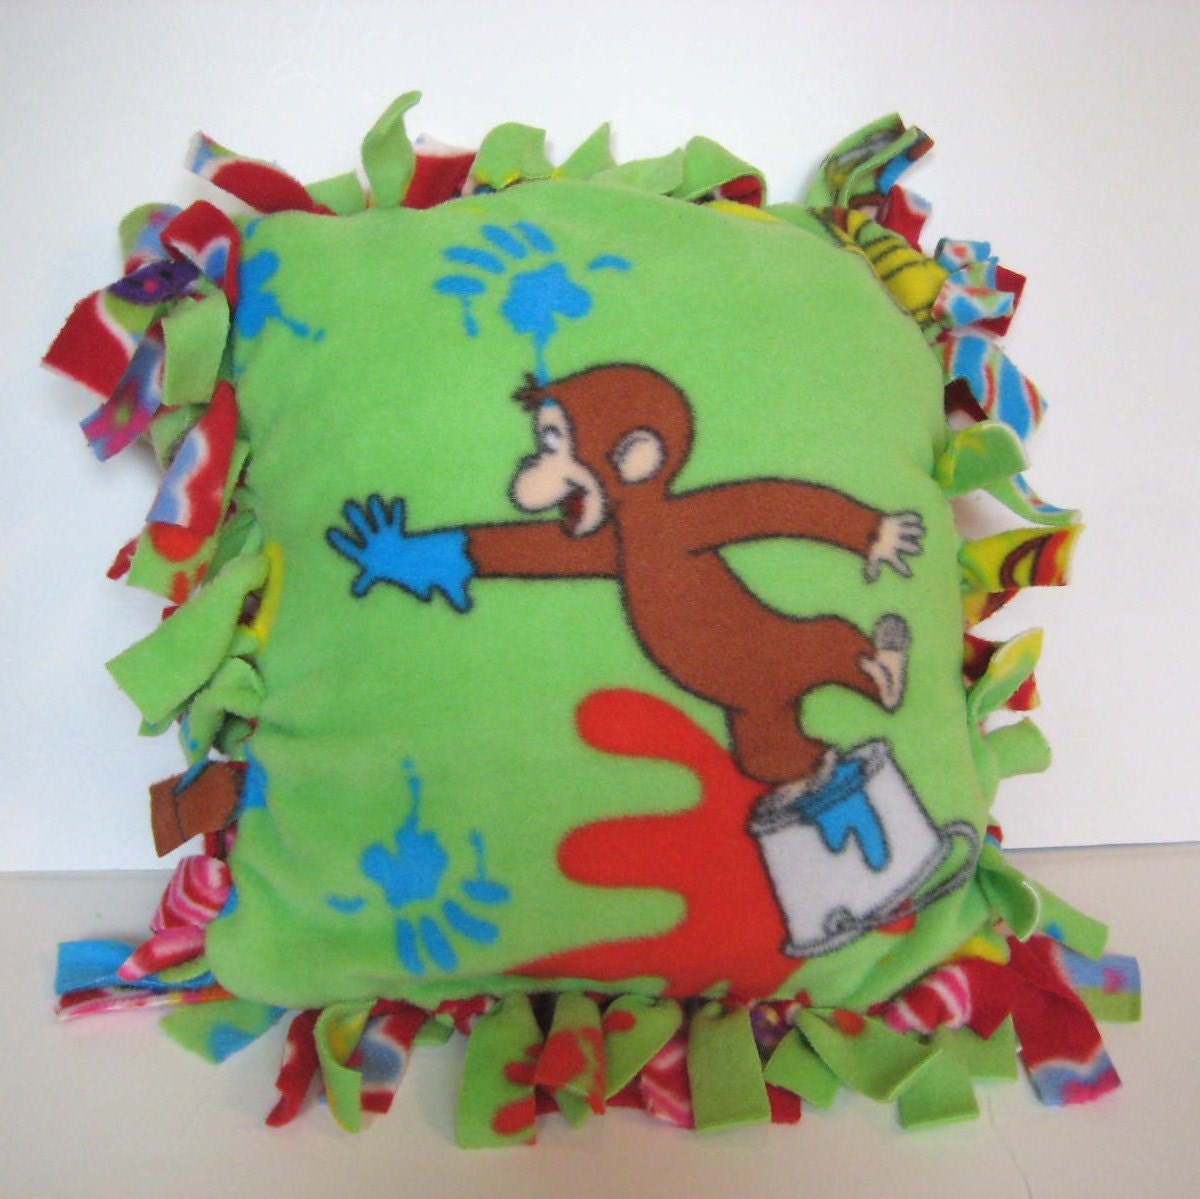
Fleece Tie Pillow Tutorial
Materials
You will need:
*Sharp pair of fabric scissors
*2 pieces of fleece 18"x18"
*Pins
*2 pieces of muslin(or any cotton fabric) 13"x13"
*Stuffing (Polyfill fiber or Scrap Batting)
*Thread
Making the Pillow (or just buy a 12"x12" pillow form at the store)
1) Cut the fabric 13"x13" and pin together.
2) Starting about 3 inches from a corner, start sewing all the way around the fabric square. Stop when you are about 5 inches from where you began. Turn the pillow right inside out.
 3) Stuff your pillow to desired plumpness.
4) Turn under the raw edge, pin and top-stitch to complete.
Making the Pillow Case
1) Cut the fleece to the dimensions given above.
2) Place the fleece wrong sides together and pin.
3) Cut a 3-inch square out of each corner.

4) Then, through both layers, cut 1 "x3" fringe, to tie, all the way around the pillow.
5) Tie front to back for each tie, leaving some open on the last side. Once you have made the pillow, insert the pillow in the case and close the last few ties. You are done!
The Curious George Pillow above is available to purchase in my Etsy Shop.
Thursday, August 21, 2008
No Sew Fabric Crib Rail Guard Tutorial - Now Availble!
 One of my friends on Etsy, BareBottomsBoutique, used my quilted crib rail guard tutorial to make a crib rail guard for her son’s nursery. She modified the pattern to fit with the supplies she had on hand. She used fleece instead of quilting batting between two layers of cotton or flannel. She also used snaps, since she did not have buttons on hand. After chatting with her about using fleece, I was inspired to write another tutorial that did not involve sewing. This is an easy project that anyone could complete, even if you have no sewing experience. You only need fleece, basting safety pins, scissors, a measuring tape and about an hour of time. If you make more than one, it will take a bit longer. Pick out your own fabric to match the bedding in your nursery, or a fabric that your babe would love – ducks, bears, frogs, trucks, pink polka dots, etc. This pattern is available in My Etsy Shop.
 Please do not copy any part of this post or photos without prior written permission.
Thank you!
Monday, August 11, 2008
Rag Rug - Getting Started

I received a 28 pound box of fabric from a friend on Etsy to make her a rag rug. There is a total of 18 different fabric - not all the same material. I have cotton, polyesters, knit cotton, velor, and one I am not even sure what it is! I have managed to prepare 9 of the 18 fabrics. One is missing from the photo. I fold the fabric and cut it into 1 1/2 inch strips. I am using scissors and eyeballing the measurement, so the width does vary a little. At the ends of each strip, I cut a small slit about 1/2 an inch long. Then, I connect the strips by looping the next strip through itself attached to the ball of "fabric yarn" that I have started. Please visit LauraJane's YouTube Video to see how the "slit" method works for joining the strips of fabric. I have also read about this method in a rag rug pamphlet. If I remember, I will look to see what the pamphlet is called. I still have a bit of work to do and am excited to start the rug. I may make a few hot pads before I begin the room size rug to get a little more practice in. Stay tuned to watch my progress on this project. I will share hints and tips that I discover along the way. For instance, I first joined all the fabric strips and then rolled it into a ball of yarn. For me, I have found it easier to add one strip at a time and roll the ball of yarn as I proceed. The only problem is my son wants to play with the "ball."
Saturday, June 14, 2008
Math and Sewing
I am a high school math teacher and I love all of the mathematics that is woven into sewing and designing your own patterns. One of my latest sewing creations is a set of fabric blocks. The pattern for a block is simply a mathematical "net" for a 3-dimensional figure. A net is a 2-dimensional representation of a 3-dimensional figure that can be assembled to create the 3-dimensional figure. For a block, which is a cube, there are six sides, so six squares make up the block as shown below.
 When sewing, I start by sewing all adjacent sides together. Then, I sew the two sides, and the front and back to the bottom. Finally, I sew the top to each side. For the last edge, I sew only a little ways in from each corner and stop. Next, I turn the block right sides out. At this point, it is time to stuff the block. Finally, sew the opening on the last edge.
Here is a picture of a Jumbo Block that I made for the nursery. Since it is larger, I top stitched each edge to help keep its shape. It is great to double as a pillow for mom or dad after a long night! If you are interested in purchasing this block or one like it, visit my Etsy Shop.
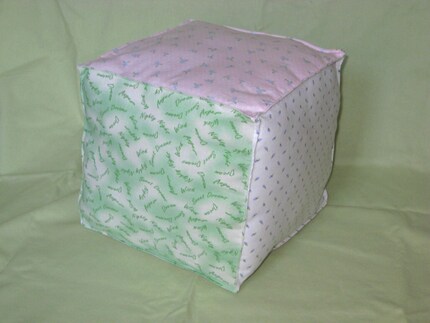
 When sewing, I start by sewing all adjacent sides together. Then, I sew the two sides, and the front and back to the bottom. Finally, I sew the top to each side. For the last edge, I sew only a little ways in from each corner and stop. Next, I turn the block right sides out. At this point, it is time to stuff the block. Finally, sew the opening on the last edge.
Here is a picture of a Jumbo Block that I made for the nursery. Since it is larger, I top stitched each edge to help keep its shape. It is great to double as a pillow for mom or dad after a long night! If you are interested in purchasing this block or one like it, visit my Etsy Shop.
Wednesday, May 28, 2008
Custom Curtain Valance Tutorial
INTRODUCTION
We painted our kitchen and those old valances just had to go!! Read my previous post to see why I decided to make these myself! Click Here. You do not need a liner for this pattern, because the design is a tube providing two layers of fabric. Once you figure out how much fabric you need, the sewing is VERY EASY!! I think that even a beginner sewer could handle this project; so get started!!
Materials & Equipment:
Fabric (See below to figure out how much)
Thread to match
Pins
Ruler
Measuring tape
Basic Sewing Machine
BEFORE YOU BEGIN
First, you need to figure out how much material you are going to need. Measure the length of your window. Multiple that number by 1.5. (If you want more of a scrunch, then multiply by 2.) This is the length needed for that window. I found that most home decor fabric that I looked at came in widths of 54 inches. As a result, I needed to sew pieces together to get the required length. The height for this tutorial is 30 inches which inclues a 3 inch hole for the curtain rod. (Note: Heights can be adjusted to meet your needs.) So, after you have found your required length(s), add them together, if you are customizing more than one window. So, say that your lengths were 78, 84 and 100. This is close to what mine were for the kitchen in our old farmhouse. Each window is different. I don't remember the actual numbers. For the 100 length, I would use 2 widths of fabric (108 inches) and sewed them together. Note: It is okay if your lengths are approximate and go over a bit; but you really should try to use the minimum. (Rule of thumb: Use a length 1.5-2 times the measure of your window.) For the 78 and 84, I took one width of the fabric and cut it in half. Then, I sewed each half to a complete width of 54 to give 81 inches for each valance. At $16 a yard, I wasn't going to buy another 30 inches of fabric for 3 inches. So, I needed 2 widths for the 100 length, and 3 widths for the other two windows. So, we have a total of 5 widths of fabric at 30 inches each. 5x30=150 inches of fabric. 150/36=4.167 yards = 4 yds, 2 inches. Always round up, because they never square up your fabric before they cut it in the store. So, I bought 4.25 yards of fabric. Square your fabric and cut the required lengths and sew pieces together. Now we are ready to begin!!
STEP 1
Turn and press raw edges 1/2 inch. Then sew 1/4 inch seam. Then zigzag from seam to the edge. I do not have a serger, so two trips down the edge were required.
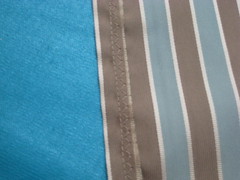 Step 2
Fold fabric in half, right sides together, pin and then sew 1/4 inch seam. Press seam and then turn fabric right sides out.
 Step 3
Slide tube of fabric so that the seam is 4 inches from the top and pin so it stays in place.
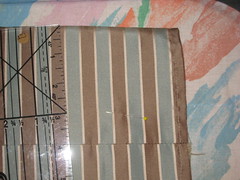
Step 4
Then, stitch a seam 1 inch in from the top to create the header.

Step5
Stitch just under seam to create the bottom of the 3 inch hole for the curtain rod.
 You are Done!! Time to hang those new Valances!!
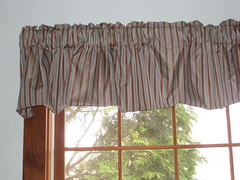
We painted our kitchen and those old valances just had to go!! Read my previous post to see why I decided to make these myself! Click Here. You do not need a liner for this pattern, because the design is a tube providing two layers of fabric. Once you figure out how much fabric you need, the sewing is VERY EASY!! I think that even a beginner sewer could handle this project; so get started!!
Materials & Equipment:
Fabric (See below to figure out how much)
Thread to match
Pins
Ruler
Measuring tape
Basic Sewing Machine
BEFORE YOU BEGIN
First, you need to figure out how much material you are going to need. Measure the length of your window. Multiple that number by 1.5. (If you want more of a scrunch, then multiply by 2.) This is the length needed for that window. I found that most home decor fabric that I looked at came in widths of 54 inches. As a result, I needed to sew pieces together to get the required length. The height for this tutorial is 30 inches which inclues a 3 inch hole for the curtain rod. (Note: Heights can be adjusted to meet your needs.) So, after you have found your required length(s), add them together, if you are customizing more than one window. So, say that your lengths were 78, 84 and 100. This is close to what mine were for the kitchen in our old farmhouse. Each window is different. I don't remember the actual numbers. For the 100 length, I would use 2 widths of fabric (108 inches) and sewed them together. Note: It is okay if your lengths are approximate and go over a bit; but you really should try to use the minimum. (Rule of thumb: Use a length 1.5-2 times the measure of your window.) For the 78 and 84, I took one width of the fabric and cut it in half. Then, I sewed each half to a complete width of 54 to give 81 inches for each valance. At $16 a yard, I wasn't going to buy another 30 inches of fabric for 3 inches. So, I needed 2 widths for the 100 length, and 3 widths for the other two windows. So, we have a total of 5 widths of fabric at 30 inches each. 5x30=150 inches of fabric. 150/36=4.167 yards = 4 yds, 2 inches. Always round up, because they never square up your fabric before they cut it in the store. So, I bought 4.25 yards of fabric. Square your fabric and cut the required lengths and sew pieces together. Now we are ready to begin!!
STEP 1
Turn and press raw edges 1/2 inch. Then sew 1/4 inch seam. Then zigzag from seam to the edge. I do not have a serger, so two trips down the edge were required.
Step 2Fold fabric in half, right sides together, pin and then sew 1/4 inch seam. Press seam and then turn fabric right sides out.
Step 3Slide tube of fabric so that the seam is 4 inches from the top and pin so it stays in place.
Step 4
Then, stitch a seam 1 inch in from the top to create the header.
Step5
Stitch just under seam to create the bottom of the 3 inch hole for the curtain rod.
You are Done!! Time to hang those new Valances!!
Wednesday, May 7, 2008
Custom Curtain Valances for My Kitchen
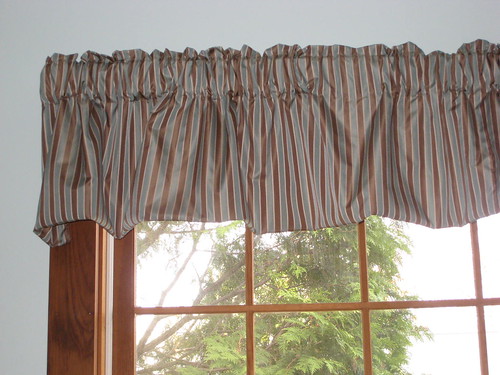
Since my husband and I bought our old farmhouse from the 1860's 6 years ago, we have slowly been painting and re-carpeting a couple rooms a year. The last two rooms to get a face lift were the dining room and the kitchen. We chose Valley Mist by Behr found at the Home Depot for the color. I must have brought home 200 paint colors to match the color to the curtains in the dining room, and the curtains were bought to match the fabric on the dining room chairs. Then we wanted to paint the kitchen a shade of green. We decided to paint the kitchen and dining room the same color. When my husband finished painting the walls in the kitchen, I looked up at the valances and thought, "These have got to go!" So, I took a paint sample to the fabric stores in search of home decor fabric to match the walls.
I am very glad that I know how to sew. We looked into getting custom curtains for the library/den in our house when we redid that room. For 5 windows, the estimate was something like $2,800!! And that did not include the drapery hardware. The sales lady told us that we really had to look at curtains like another piece of furniture. I went to Bed Bath and Beyond and bought curtains and rods that look just lovely for under $200.
Now I needed a pattern. I looked in a book about curtains that I had bought several years ago. Nothing jumped out at me. Then, I looked online. I found a nice tutorial, but not really what I wanted. So, I used the old valances for my pattern - which is actually a very simple pattern for a valance. I took pictures as I sewed so that I can write my own tutorial later on. If you can sew a straight line, then you too could make these valences.
I really like the brown with the green-blue striped fabric, because it helps accent the wooden windows. Click Here to see my tutorial on how to make these yourself!
Subscribe to:
Posts (Atom)