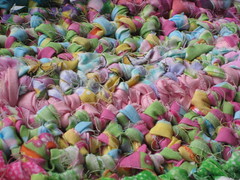
 One of the moms in my group, Fabulous Artistic Moms of Etsy, asked if I would make her a rag rug. I had never made one before, but it looked like something fun to try, and I am always up for a challenge, especially if fabric is involved.
When I was a little girl, my twin sister, my older sister and I all went to my grandmother's house after school. My grandmother, who could probably have crocheted in her sleep, taught me how to crochet. It's been a while since I've picked up a hook, but it was like riding a bike, tough to forget. I grabbed some yarn to refresh my memory before starting with fabric. Once I felt comfortable, I grabbed some fabric strips that I had stashed in a box and got to work. I used three different methods of attaching new strips. I wanted to see which I liked the best.
The Vintage Chica has lovely tutorial for crocheting rag rugs. The way she suggests to cut the fabric into strips is what I consider the first method of joining the strips. You simply cut a piece of fabric alternating which side you start from and stopping an inch short of the end each time. The result is a long strip of fabric. However, with this method there are rectangular pieces that stick out a little. She also suggests to tie the fabric strips together when you come to a new piece, but I wasn't sure if I liked the knots showing - I know, they are on the backside.
This is a closeup photo of the backside. The green pieces sticking up are the rectangular pieces at the end of the fabric when cutting strips. Then in the middle and at the end, you can see the knots by the pink and blue fabrics. However, you can't see where the fabric changed using the slit method, referenced below.
 So, I searched a bit more online. I found LauraJane's YouTube Video on preparing fabric strips. She uses the "slit method." Of the three methods, I liked the look of this one the best. You simply cut small slits in the fabric at the ends and loop a strip into the slit of its own opposite end. See the link for the video. She shows it very well.
Here is a picture of the finished mini rag rug. It was lots of fun to make and I am going to go ahead and make one for my team member.


5 comments:
The rug looks great! I love your color choices.
Decorating with kids area rugs is one of the easiest ways to revitalize, update, improve and beautify the rooms used by young people in your home. Kids rugs can turn a drab room into one full of color. Or you can use kids rugs to create a focal point or define an area of interest. Kids rugs can add warmth to otherwise cold tiles, stone or concrete floors. Kids rugs will protect hardwood floor or wall-to-wall carpeting. And the right kids rugs can tie together all of a room’s décor elements. Kids rugs are extremely versatile and can serve numerous purposes in your home. Whether you are decorating your nursery, play room, bedroom, kitchen, basement or patio, there’s a kids rug that is right for you. Unlike wall-to-wall carpet, which is normally best kept rather neutral, kids rugs can bring colorful patterns and designs into your room without overwhelming it. Plus, unlike carpeting, kids rugs can be changed with the seasons – or your mood – and are yours to keep should you move.
Beautiful rug! I've been wanting to try rug making for a while and now I'm more inspired!
It's beautiful! I just commented in another post that I wanted to see the finished project, now here it is, lol! It came out great.
Carrie
(Etsy- TigerlilyStudio)
Thanks so much for sharing this. That slit joining technique is brilliant! I'm going to try this :-)
Post a Comment