Showing posts with label Home Decor. Show all posts

Saturday, July 12, 2008

My First Rag Rug

One of the moms in my group, Fabulous Artistic Moms of Etsy, asked if I would make her a rag rug. I had never made one before, but it looked like something fun to try, and I am always up for a challenge, especially if fabric is involved.

When I was a little girl, my twin sister, my older sister and I all went to my grandmother's house after school. My grandmother, who could probably have crocheted in her sleep, taught me how to crochet. It's been a while since I've picked up a hook, but it was like riding a bike, tough to forget. I grabbed some yarn to refresh my memory before starting with fabric. Once I felt comfortable, I grabbed some fabric strips that I had stashed in a box and got to work. I used three different methods of attaching new strips. I wanted to see which I liked the best.

The Vintage Chica has lovely tutorial for crocheting rag rugs. The way she suggests to cut the fabric into strips is what I consider the first method of joining the strips. You simply cut a piece of fabric alternating which side you start from and stopping an inch short of the end each time. The result is a long strip of fabric. However, with this method there are rectangular pieces that stick out a little. She also suggests to tie the fabric strips together when you come to a new piece, but I wasn't sure if I liked the knots showing - I know, they are on the backside.
This is a closeup photo of the backside. The green pieces sticking up are the rectangular pieces at the end of the fabric when cutting strips. Then in the middle and at the end, you can see the knots by the pink and blue fabrics. However, you can't see where the fabric changed using the slit method, referenced below.

So, I searched a bit more online. I found LauraJane's YouTube Video on preparing fabric strips. She uses the "slit method." Of the three methods, I liked the look of this one the best. You simply cut small slits in the fabric at the ends and loop a strip into the slit of its own opposite end. See the link for the video. She shows it very well.

Here is a picture of the finished mini rag rug. It was lots of fun to make and I am going to go ahead and make one for my team member.

Wednesday, May 28, 2008

Custom Curtain Valance Tutorial

INTRODUCTION
We painted our kitchen and those old valances just had to go!! Read my previous post to see why I decided to make these myself! Click Here. You do not need a liner for this pattern, because the design is a tube providing two layers of fabric. Once you figure out how much fabric you need, the sewing is VERY EASY!! I think that even a beginner sewer could handle this project; so get started!!

Materials & Equipment:
Fabric (See below to figure out how much)
Thread to match
Pins
Ruler
Measuring tape
Basic Sewing Machine

BEFORE YOU BEGIN
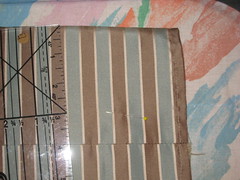
First, you need to figure out how much material you are going to need. Measure the length of your window. Multiple that number by 1.5. (If you want more of a scrunch, then multiply by 2.) This is the length needed for that window. I found that most home decor fabric that I looked at came in widths of 54 inches. As a result, I needed to sew pieces together to get the required length. The height for this tutorial is 30 inches which inclues a 3 inch hole for the curtain rod. (Note: Heights can be adjusted to meet your needs.) So, after you have found your required length(s), add them together, if you are customizing more than one window. So, say that your lengths were 78, 84 and 100. This is close to what mine were for the kitchen in our old farmhouse. Each window is different. I don't remember the actual numbers. For the 100 length, I would use 2 widths of fabric (108 inches) and sewed them together. Note: It is okay if your lengths are approximate and go over a bit; but you really should try to use the minimum. (Rule of thumb: Use a length 1.5-2 times the measure of your window.) For the 78 and 84, I took one width of the fabric and cut it in half. Then, I sewed each half to a complete width of 54 to give 81 inches for each valance. At $16 a yard, I wasn't going to buy another 30 inches of fabric for 3 inches. So, I needed 2 widths for the 100 length, and 3 widths for the other two windows. So, we have a total of 5 widths of fabric at 30 inches each. 5x30=150 inches of fabric. 150/36=4.167 yards = 4 yds, 2 inches. Always round up, because they never square up your fabric before they cut it in the store. So, I bought 4.25 yards of fabric. Square your fabric and cut the required lengths and sew pieces together. Now we are ready to begin!!

STEP 1
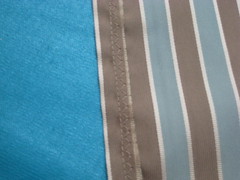
Turn and press raw edges 1/2 inch. Then sew 1/4 inch seam. Then zigzag from seam to the edge. I do not have a serger, so two trips down the edge were required.

Step 2
Fold fabric in half, right sides together, pin and then sew 1/4 inch seam. Press seam and then turn fabric right sides out.
Step 3
Slide tube of fabric so that the seam is 4 inches from the top and pin so it stays in place.


Step 4
Then, stitch a seam 1 inch in from the top to create the header.


Step5
Stitch just under seam to create the bottom of the 3 inch hole for the curtain rod.
You are Done!! Time to hang those new Valances!!

Wednesday, May 7, 2008

Custom Curtain Valances for My Kitchen


Since my husband and I bought our old farmhouse from the 1860's 6 years ago, we have slowly been painting and re-carpeting a couple rooms a year. The last two rooms to get a face lift were the dining room and the kitchen. We chose Valley Mist by Behr found at the Home Depot for the color. I must have brought home 200 paint colors to match the color to the curtains in the dining room, and the curtains were bought to match the fabric on the dining room chairs. Then we wanted to paint the kitchen a shade of green. We decided to paint the kitchen and dining room the same color. When my husband finished painting the walls in the kitchen, I looked up at the valances and thought, "These have got to go!" So, I took a paint sample to the fabric stores in search of home decor fabric to match the walls.

I am very glad that I know how to sew. We looked into getting custom curtains for the library/den in our house when we redid that room. For 5 windows, the estimate was something like $2,800!! And that did not include the drapery hardware. The sales lady told us that we really had to look at curtains like another piece of furniture. I went to Bed Bath and Beyond and bought curtains and rods that look just lovely for under $200.

Now I needed a pattern. I looked in a book about curtains that I had bought several years ago. Nothing jumped out at me. Then, I looked online. I found a nice tutorial, but not really what I wanted. So, I used the old valances for my pattern - which is actually a very simple pattern for a valance. I took pictures as I sewed so that I can write my own tutorial later on. If you can sew a straight line, then you too could make these valences.

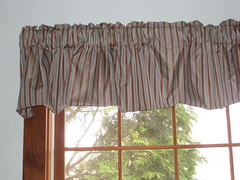
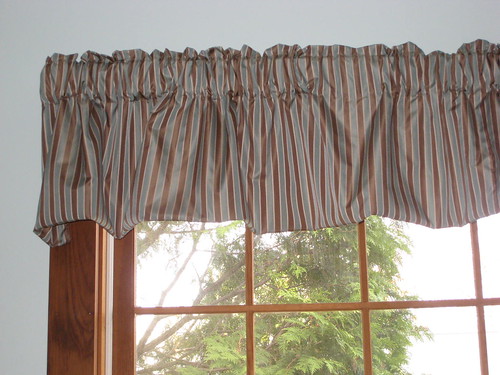
I really like the brown with the green-blue striped fabric, because it helps accent the wooden windows. Click Here to see my tutorial on how to make these yourself!