Showing posts with label Fabric Coiling. Show all posts

Monday, March 31, 2008

A Slice of Watermelon Basket - Fabric Coiled


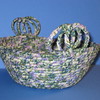
I love summer, especially all of the fresh fruit! If you look in my refrigerator in the summer months, there is sure to be a big bowl of fruit salad and watermelon! I love the fabric for this basket. The design is just the right size so that you can still see the design after wrapping the fabric. It is patterned with slices of watermelon over a blue and white plaid background. The basket has two curvy loop handles that decorate the sides. Origainally, I made two basic handles for the basket, but I wanted to make it a bit fancier, so I gave them each a twist. This adorable basket is made using the fabric coiling technique. It measures 6 inches across the top of the base and is 2.25 inches high. This basket would look great in the kitchen, out on the patio or on your desk. Visit My Etsy Shop if you are interested in purchasing this basket.


UPCOMING BLOGS
*Comparing Techniques of It's a Wrap by Susan Breier and Textile Coil Pots and Baskets: Easy Ways With Fabric and Cord by Helen Deighan
*My latest Baskets
*How to Make Different Types of Coiled Fabric Handles

Thursday, March 27, 2008

Book Review of Textile Coil Pots and Baskets: Easy Ways With Fabric and Cord by Helen Deighan

Textile Coil Pots and Baskets: Easy Ways With Fabric and Cord by Helen Deighan is a very inspirational book. I love how each section is set up with a new type of project and one for you to try at the end. She is very encouraging to have you experiment with different types of cording as well as fabrics and techniques. The book has instructions for both hand sewn baskets and machine sewn. She also gives instructions for how to make patterned baskets by using stripes and multiple colored fabrics. The only draw back I found is that since she included so many ideas in this one book, her descriptions are as thorough as they could be. She does include some photos with text to help you get started. I would recommend this as a second book to purchase if you are interested in fabric coiling projects. One technique that made this book worthwhile for me to buy was to wrap as you go. It's a Wrap suggests wrapping fabric ahead of time and then sewing. The advantage of wrapping as you go is you do not have to spend a couple hours wrapping fabric before getting started and you can change colors at the correct spot if you are creating a multi colored basket. I find that if I am making a large basket, I like to wrap the fabric before I start, but with a smaller project, I like to wrap as I go!

If you would like to read the book review I wrote for It's a Wrap, by Susan Beier, click HERE.

Friday, March 21, 2008

Happy Hour - Time for a Margarita!


It's Friday and it's Happy Hour Somewhere. I chose to name this basket with a margarita theme, because the whole time I was working on it I thought that the color reminded me of margaritas. This festive basket will be a great accent to store those little necessities needed for your next happy hour gathering. This would be the perfect hostess gift if you are attending a Cinco de Mayo Party! The base of this basket measures 6.25 inches across the top and is 2 inches high. It is decorated with single loop handles on each side.

This basket is for sale in My Etsy Shop.
CHEERS!

Monday, March 10, 2008

Spring Medley Oval Basket - Fabric Coiled

Spring is on its way! Brighten up any room with this basket. It is made with white fabric covered with tiny blue and yellow flowers. The specially made flower handles add extra decoration to this beautiful basket. The top of this basket measures 8 x 10.5 inches and is 3.5 inches high. As with any basket, it is truly one of a kind and would make the perfect gift for a birthday, anniversary, hostess, mother's day, or even for yourself! This basket and others are for sale in my Etsy Shop. Just click on the photo of the basket to visit my shop.

To make the handles, I made a round center by cutting a circular piece of fabric and sewing around the edge. Then I cinched it up tight. Next, I looped the wrapped cording into petals. I had so much fun making the flower handles.

Sunday, February 24, 2008

Purple Petunia Basket - Triple Loop Handles

My latest fabric coiled basket is made from purple petunia spring fabric. I never know how I am going to finish a basket when I start it - this is half the fun! When it was time to make the handles, I decided to go with a triple loop. To make triple loop handles, measure out the amount of fabric needed by looping the cording three times. Hold it out to the side and continue sewing the top edge of cording. Repeat for the other side as well. After finishing the top edge, sew the loops in place by hand. This basket is available to purchase at my Etsy shop http://www.newenglandquilter.etsy.com
Just in time for spring! This darling basket is made from purple petunia fabric using the fabric coiling technique. It has triple loop handles which make it truly unique. The top of the base measures 7.5 inches across the top and is 2.75 inches high. The height to the top of the handles measures 4 inches. This basket would be great in so many rooms of your home. This would be a lovely gift for anyone or a special treat for yourself!

Upcoming Blog Entries (Not necessarily in this order):
*Book Review of Textile Coil Pots and Baskets: Easy Ways With Fabric and Cord by Helen Deighan
*Comparing Techniques of It's a Wrap by Susan Breier and Textile Coil Pots and Baskets: Easy Ways With Fabric and Cord by Helen Deighan
*My latest Baskets
*How to Make Different Types of Coiled Fabric Handles

Saturday, February 16, 2008

It's a Wrap - Book Review


It's a Wrap by Susan Breier
This book is an excellent resource for anyone who would like to try fabric coiling. Not only does the author have detailed written descriptions of her instructions, but helpful photos to go along with most steps. If you have interest in fabric coiling and know how to use a basic sewing machine, then I would highly recommend this book as a first book about fabric coiling. This book gives easy to follow step by step instructions for making bowls, baskets, pots, and bags. An 80 or 90 Universal size needle is recommended for your sewing machine. I would pick up a few extras. She also recommends to use cotton clothesline for the cording, 3/16 inch, which can be found at Walmart or your local hardware store. I found some poly-cotton cording at Rite Aide, but it is a bit thinner and I like the cotton cording better. She recommends not using cording wider than 7/32 inches, since her techniques require to assemble the coiling on a sewing machine. She also includes an inspirational photo gallery in each section of the book. My next book review, Textile Coil Pots and Baskets: Easy Ways With Fabric and Cord by Helen Deighan, has directions for hand sewing and machine sewing baskets ; so you will have more flexibility choosing materials with her methods.

I saw this book at JoAnn Fabrics and knew that this was a craft that I wanted to try. Check out some of the baskets I have already made in my previous blogs.

Visit my Artfire Studio and Etsy Shop to see some of the baskets I have made.

Upcoming Blog Entries (Not necessarily in this order):
*Book Review of Textile Coil Pots and Baskets: Easy Ways With Fabric and Cord by Helen Deighan
*Comparing Techniques of It's a Wrap by Susan Breier and Textile Coil Pots and Baskets: Easy Ways With Fabric and Cord by Helen Deighan
*My latest Baskets
*How to Make Different Types of Coiled Fabric Handles

Wednesday, February 6, 2008

Heart Basket

Heart Basket
Heart Basket,
originally uploaded by New England Quilter.
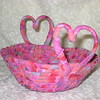
This sweet little basket was specially made as a Valentine's Day gift for someone special! I originally was just going to add loops for handles to this basket. However, after sewing the handles to the basket, I thought that the loops were a little too long. So, I turned the loops into hearts. To make the handles, I sewed two loops onto the basket - one on each side. Then I pinched the top of each loop together to form the heart, and then stitched where the pinch was located. So, my long handles turned into lovely hearts!

Upcoming Blog Entries (Not necessarily in this order):
*Book Review of It's a Wrap by Susan Breier
*Book Review of Textile Coil Pots and Baskets: Easy Ways With Fabric and Cord by Helen Deighan
*My latest Baskets
*Different Types of Coiled Fabric Handles
*Coiled Fabric Surprise - not a Basket!

Tuesday, January 29, 2008

Blueberry Coiled Fabric Basket


Here is my first coiled fabric basket. It measures 8 inches across the top and is 3 inches high. I used the same blueberry fabric as the coasters. For the handles, I looped the coils as I was sewing and then afterwards secured them by hand. Embroidery scissors were just the right tool to use to snip any loose threads after completing the basket.

Saturday, January 26, 2008

Tips for Fabric Coiling - Machine Sewing

  1. Use a Thread Color the same color as your pattern and not the background.
  2. If machine sewing, after tailing off your coil, only cut one thread short. Pull some thread from the spool and then cut with a length of thread attached to your project. Thread through a hand sewing needle. Then hand sew the tail snug and tight to the last coil to help blending in the end point.
  3. Walmart is a good place to find 3/16" fabric clothesline. It is half the price there than at my local hardware store.
  4. In a pinch, the top of a glue stick makes a great substitute for a thimble.

I will be adding to the list as I discover useful tips for fabric coiling.

Books reviews on fabric coiling. I have just bought a second book on fabric coiling. I will review them both books about fabric coiling in my blog once I have had a chance to read the second book.

Thursday, January 24, 2008

Another Coiled Fabric Coaster - Practice Makes Perfect!

So, I made my second coaster today. It was easier the second time. I actually reversed the stitch length and width and like how it came out better. Also, I used blue thread which goes with the pattern instead of the background; so it accents the blueberries well. So, I learned to use a thread color that matches the pattern and not the background. I measured the cording today and figure that one coaster takes about 7.5 feet of length. I think that I will make two more coasters with this fabric to get some more practice before I start the bowls. We'll see ... I really want to make a bowl ;)

Wednesday, January 23, 2008

Coiled Fabric Adventure - My first creation

So, I was going to make a plate for my first coiled fabric project. However, we could really use some baby friendly coasters at my house, so I stopped the coiling at the size of a coaster. I am going to make a few more and experiment with the length and width of my stitch as well. The inner coil is the toughest part to get; so making a few more coasters will give me more practice with that as well. He is a photo of my first coaster.

Monday, January 21, 2008

Coiled Fabric - My latest crafting adventure


My latest interest is fabric coiling. I was in the fabric store this week and saw a book on this topic, It's a Wrap. I knew that this was something that I wanted to try out. So, I bought the book and the necessary materials to get started on my latest crafting adventure. I am currently in the process of wrapping fabric on clothes line. Then the line will be coiled to make plates, bowls, baskets, bags, whatever. Of course I am starting with the most basic, the plate. I hope to make some more progress on it today! Here is what the coiling process looks like. I'll post more pictures when it's done.